Mixed Media Cotton Dress

Nothing says summer like a great cotton sundress! This pattern for an adorable mixed media toddler sundress was inspired by my niece Hannah who just turned one this month and took her first steps! Now that she’s toddling, dresses are a little more practical - perfect timing with the start of summer too! The bodice of the dress is knit using Bernat Softee Baby Cotton yarn and features short sleeves and a subtle seed stitch pattern. The gathered skirt is made from 100% cotton print fabric and is attached to the bodice using bias tape and a simple seam from a sewing machine - though you could also hand sew the skirt on if desired.
I love this dress because it’s so simple and quick to create and looks really cute. The bodice only takes a few hours to knit up, and if you’re using a sewing machine, the skirt can be created in about an hour as well.
A couple of tips for this pattern:
Selecting fabric: if possible, try and purchase a cotton blend or permanent press fabric as it will wrinkle less easily. Unfortunately my local fabric store was out of this fabric type, so I ended up using 100% cotton, and that works great too. For more economical fabric, look for fabric at the back of the store where the fabric is often folded instead of on bolts. You only need a small amount of fabric for this pattern, so you can often use remnants which are heavily discounted.
Sizing: this pattern should fit an 18-24 mo. old, but be sure to check your gauge and the measurements of your child. Remember that the sewn skirt is not as stretchy as a knit dress, so you may want to make the dress an inch or two wider than your child’s chest measurements to ensure there is plenty of room for them to easily get it on and off.
Hem: when making this dress for my niece I actually used a double hem. A double hem is when you hem it once as you normally would and then you turn it under and hem it again. This is a great idea for kids clothes as they grow so quickly. Once they are too tall for the double hem, you just rip out the second hem and it’s already hemmed and ready to go at the new length.
SPECIFICATIONS
SIZES
18-24 months old; ~20-21” chest.
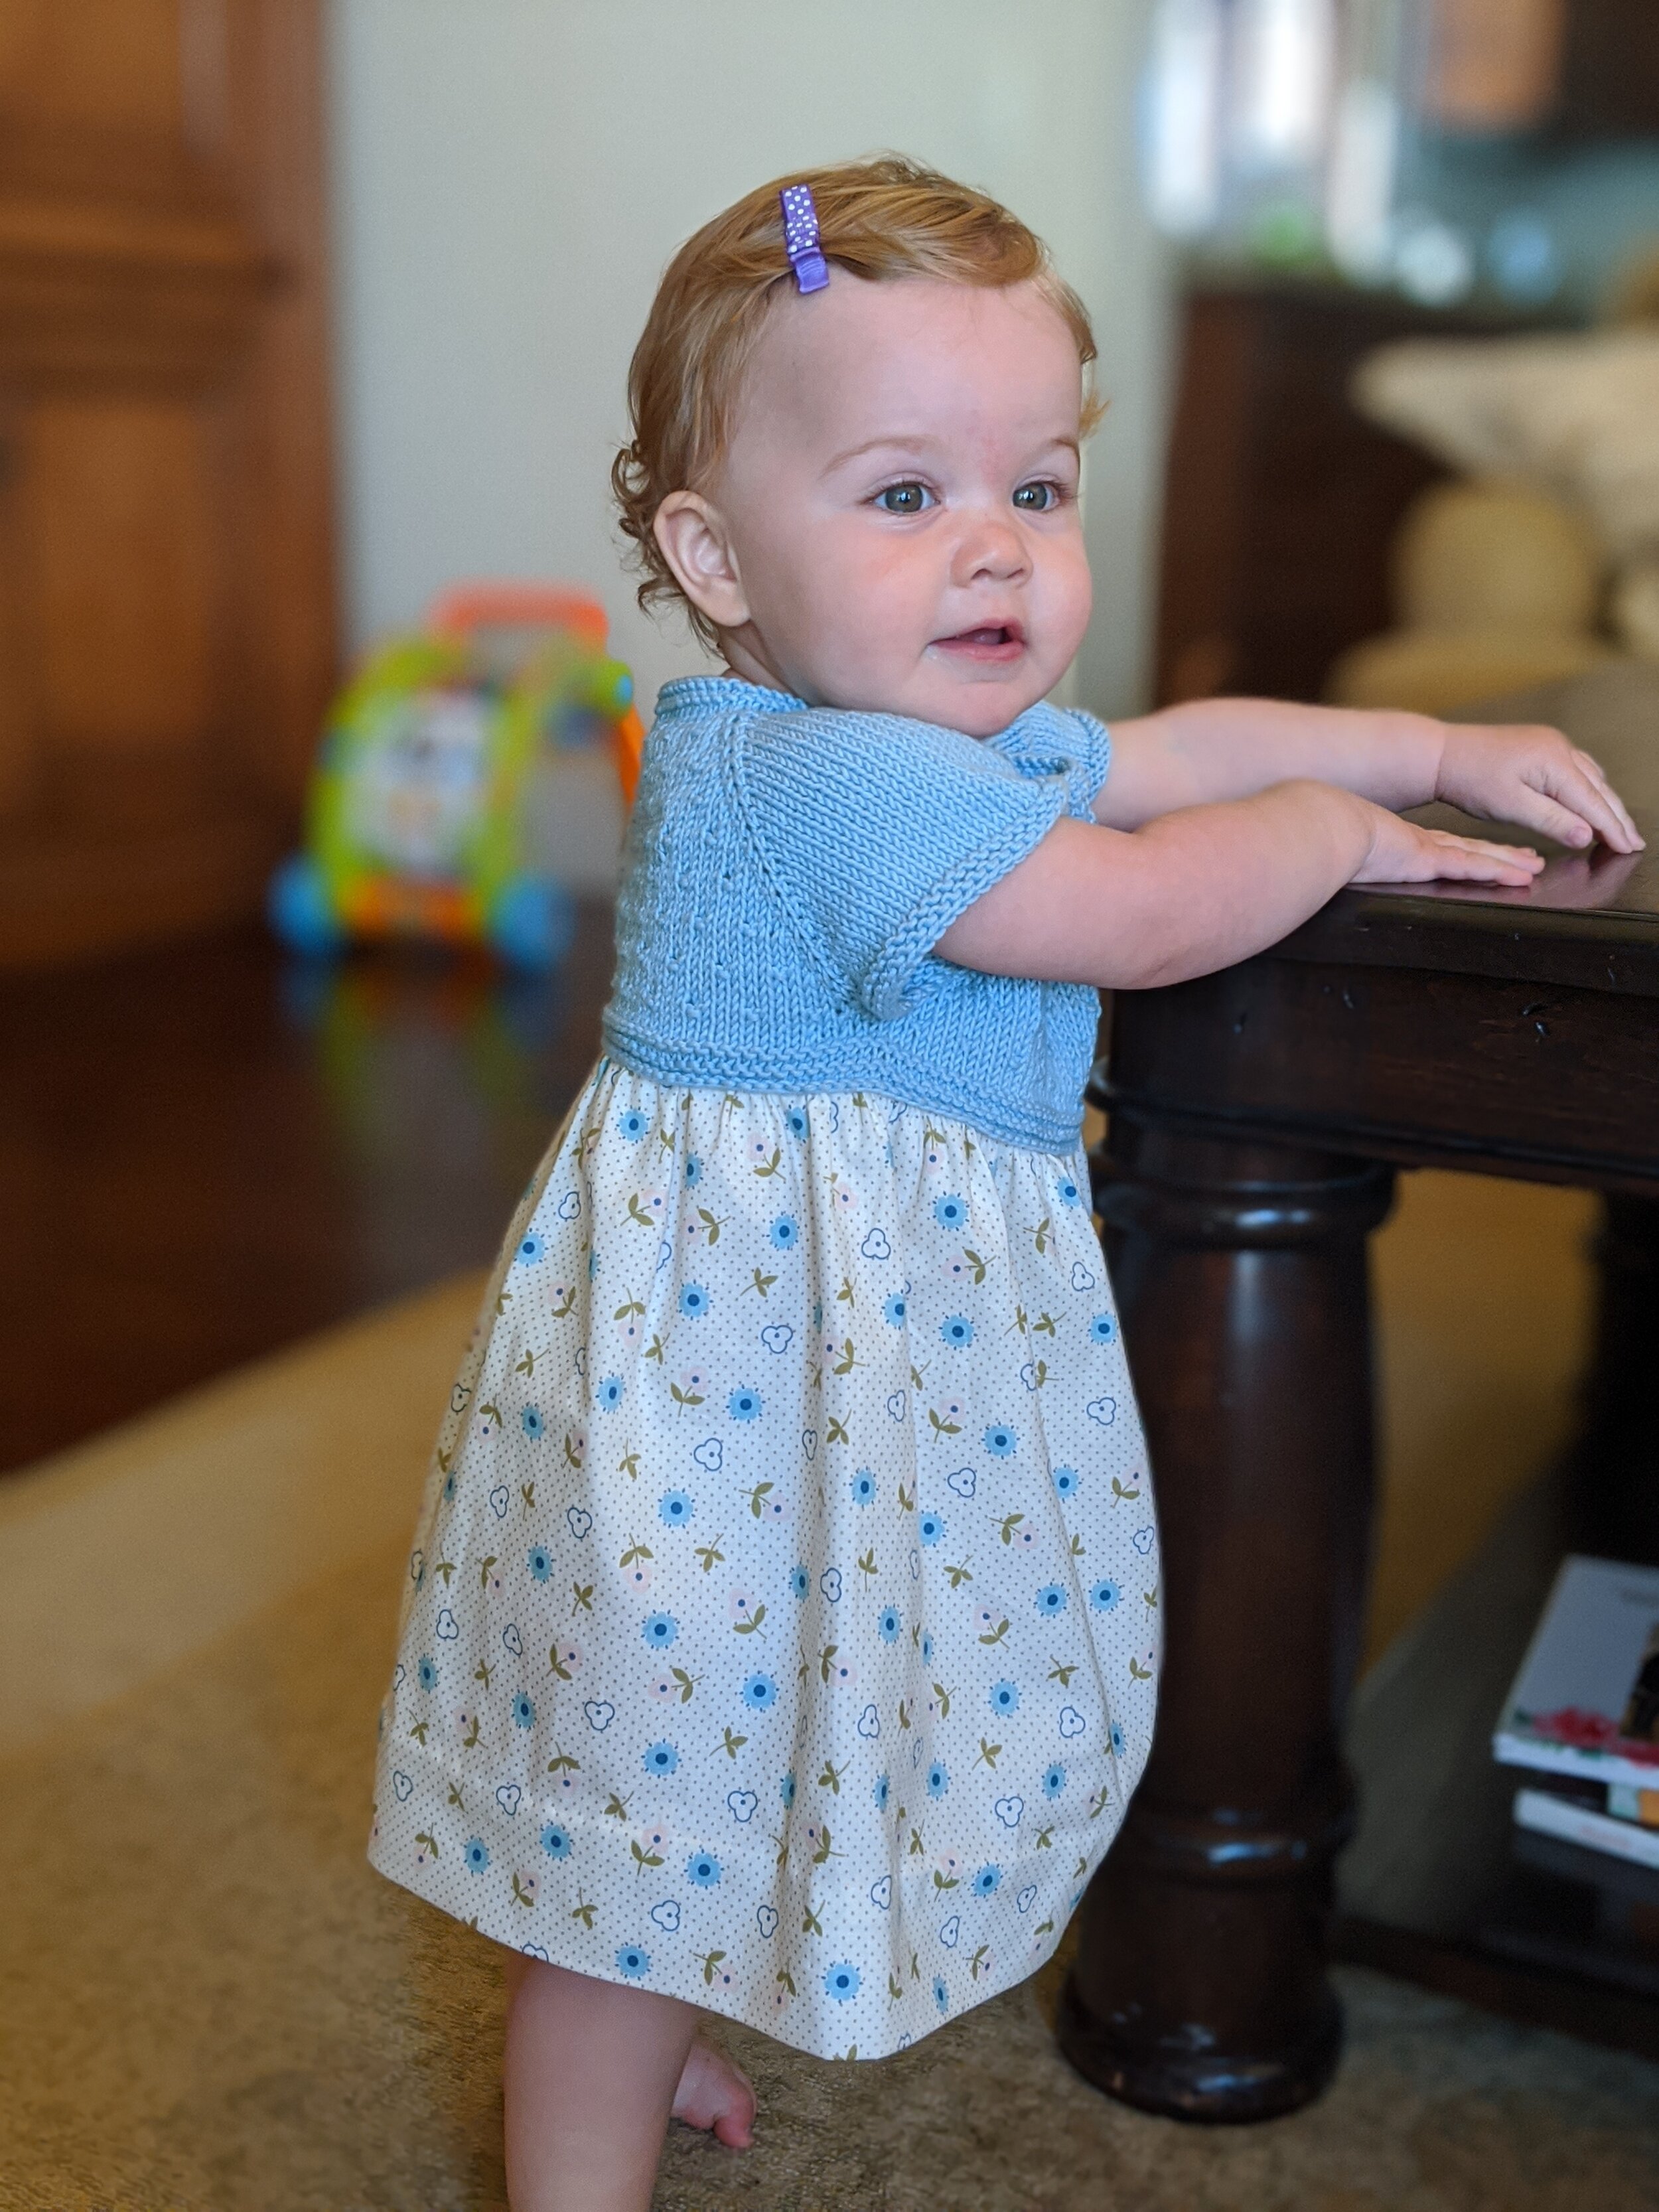
Note: The baby in the photo is 12 months old, and it’s a little big on her, but works.
GAUGE
10 sts x 14 rows = 2” x 2”
MATERIALS
Yarn: ~120 yds Bernat Softee Baby Cotton yarn in Sky Blue
Knitting needle: Size US4 40″ circular needle (for magic loop) - note: I tend to have a fairly loose stitch, so you may want to use larger needles to obtain the same gauge
Fabric: ~1/2 yard of cotton fabric in coordinating print (18” x 45”).
Yarn or darning needle
Scissors
Sewing machine
Bias tape
Thread in colors to match your bodice and skirt
Straight pins and needle
Iron
ABBREVIATIONS
k - knit
p - purl
K2tog - knit 2 together
YO - yarn over
sl st - slip stitch
INSTRUCTIONS
Knit Bodice
Cast on 82 sts
R1-4: k across
R5 (ws): k5, p11, pm, p12, pm, p26, pm, p12, pm, p11, k5
R6 (rs): k2, yo, K2tog, k1, k across remaining sts, and kfb before and after each marker (90 sts)
R7 and all odd rows: k5, p across to last 5 sts, k5
R8: k5, k1, p1, (k3, p1) repeat until 2 sts remain before marker, k1, kfb, sm, kfb, k until 1 sts before marker, kfb, sm, kfb, k1, p1, (k3, p1) repeat until 1 st before marker, kfb, sm, kfb, k until 1 sts before marker, kfb, sm, kfb, k1, p1, (k3, p1) repeat until 6 sts remain, k6 (98 sts)
R10: k across, and kfb before and after each marker (106 sts)
R12: k5, (k3, p1) repeat until 2 sts remain before marker, k1, kfb, sm, kfb, k until 1 sts before marker, kfb, sm, kfb, k1, p1, (k3, p1) repeat until 1 st before marker, kfb, sm, kfb, k until 1 sts before marker, kfb, sm, kfb, k1, p1, (k3, p1) repeat until 8 sts remain, k8 (114 sts)
R14: k across, and kfb before and after each marker (122 sts)
R16: k5, k1, p1, (k3, p1) repeat until 2 sts remain before marker, k1, kfb, sm, kfb, k until 1 sts before marker, kfb, sm, kfb, k1, p1, (k3, p1) repeat until 1 st before marker, kfb, sm, kfb, k until 1 sts before marker, kfb, sm, kfb, k1, p1, (k3, p1) repeat until 6 sts remain, k6 (130 sts)
R18: k across, and kfb before and after each marker (138 sts)
R20: k5, (k3, p1) repeat until 2 sts remain before marker, k1, kfb, sm, kfb, k until 1 sts before marker, kfb, sm, kfb, k1, p1, (k3, p1) repeat until 1 st before marker, kfb, sm, kfb, k until 1 sts before marker, kfb, sm, kfb, k1, p1, (k3, p1) repeat until 8 sts remain, k8 (146 sts)
R22: k2, yo, K2tog, k1, k across remaining sts, and kfb before and after each marker (154 sts)
R24-31: repeat rows 8-15. Should have 186 sts after row 31.
Join for knitting in the round: with RS facing you, slip the last 5 stitches of the row onto cable or double pointed needle. Hold those 5 sts behind the first 5 sts of the row. Using the right needle, knit the first st on the left needle together with the st farthest to the right on the cable needle. Continue knitting together the sts on the left needle with the one behind it on the cable needle until all 5 sts on the cable needle have been worked.
From here, you will be knitting in the round. Place marker to mark the beginning of the round.
R32: k1, p1, (k3, p1) repeat until 2 sts remain before marker, k1, kfb, sm, kfb, k until 1 sts before marker, kfb, sm, kfb, k1, p1, (k3, p1) repeat until 1 st before marker, kfb, sm, kfb, k until 1 sts before marker, kfb, sm, kfb, k1, p1, (k3, p1) repeat until 2 sts remain in the round, k2 (189 sts)
R33: k around
R34: k around, and kfb before and after each marker (197 sts)
R35: k around
R36: (k3, p1) repeat until 2 sts remain before marker, k1, kfb, sm, kfb, k until 1 sts before marker, kfb, sm, kfb, k1, p1, (k3, p1) repeat until 1 st before marker, kfb, sm, kfb, k until 1 sts before marker, kfb, sm, kfb, k1, p1, (k3, p1) repeat to end of round (205 sts)
R37: k around
R38: k until first marker (27 sts), remove marker, sl next 44 stitches onto a stitch holder or scrap piece of yarn (these 44 sts will become our first sleeve and we will pick them up again later), remove 2nd marker, knit across to 3rd marker (58 sts), sl next 44 sts onto a stitch holder or scrap piece of yarn (this will be the second sleeve), remove 4th marker, continue knitting across remaining 32 sts to complete the round.
You should now have 117 sts in the round for the remainder of the bodice and 44 sts on each stitch holder which will later form the sleeves.
R39: k around (117 sts)
R40: p around
R41: k around
R42: p around
R43: k around
R44: cast off purlwise; bind off and weave in end.
Knit sleeves
R1: starting with the right sleeve, sl 44 sts from the stitch holder back onto your working needles. The beginning of the round should be in the center of the armpit. Attach the working yarn at the center of the armpit. K around, picking up 2 sts in the armpit before your complete the round in order to close the gap. Optional: PM to note the beginning of the round.
R2: k around (46 sts)
R3: p around
R4: k around
R5: p around
R6: cast off knitwise; bind off and weave in ends.
Repeat this process on the left sleeve, weaving in all remaining ends on the bodice.

Front of bodice

Back of bodice
Prepare the Skirt
Step 1: Sew the first seam
Take your half yard of fabric (measurements ~45” x 18”) and fold in half with the right sides facing inward matching up the short ends to create a circle. Using a sewing machine (or by hand) sew a 3/8” seam the entire length of the 18” edge. Press the seam flat using an iron.

Step 2: Create the gathers
To create the gathers we are going to machine stitch 2 rows down the length of the skirt we want to gather, 1/4” from the edge and 1/4” apart. Set your machine settings to the widest stitch setting (on mine it’s 6mm). Start and finish these rows on either side of the seam you just created - i.e. do not sew over the seam as it will be harder to gather. Be sure to backstitch only at the START of each row. After you have completed both rows of stitching, grab the 2 loose threads facing you from the side that you did not backstitch (discard the loose threads at the back of the fabric). Being very careful not to snap the threads, gently pull these loose threads and push the fabric towards the backstitched end. Continue gathering in this manner until the circumference of the gathered side of the skirt is the same size as the bottom of the knit bodice. Once you have achieved the desired size, tie your loose threads together to secure in place.

Step 3 (optional, but recommended): Attach bias tape
If your fabric is like mine, the cut edge tends to fray pretty badly. To create a cleaner look, I attached bias tape to cover the gathered frayed edge. Place the bias tape over the gathered edge all the way around and secure in place with straight pins. Sew the bias tape in place by stitching very close to the bottom edge of the bias tape, being sure to catch both the front and back sides of the bias tape with your stitches. I used a straight stitch to secure the bias tape, but you can also use a zig zag stitch if desired. Turn your skirt right side out and make sure you’ve successfully sewn through both sides of the bias tape.
Depending on the width of your bias tape, it may not cover both of your gathering rows, which is okay - we just need it to cover the frayed edge of the fabric.

Attach the skirt
Position your skirt so that the bias tape is on the inside of the bodice and the lower gathering seem on the skirt is hidden by the bottom edge of the bodice. Secure in place using straight pins. Attach the skirt to the bodice by stitching all the way around the bottom edge of the bodice.
Tip: if your dress is like mine, then the color of the bodice and fabric are different. Be sure to match your top thread and bobbin threads accordingly if possible. For mine, I used blue thread on top, and an off-white thread in the bobbin.
Hem the dress
Currently your dress is ~18” long - which is probably way too long for any toddler, so we need to hem it. The length of the hem is completely up to you. Some people like short dresses, others like long dresses - the choice is yours!
For my dress, I cut off 3.5” of fabric, then I completed a few steps to complete the hem:
Machine hem: First, I added a 1/2” machine hem. To do this, I turned the edge under 1/2” then turned it under 1/2” again so the frayed edge was hidden; then I stitched all the way around. If you don’t mind the hem stitching showing, you can leave it like this; however, I prefer an invisible hem.
Invisible hem: After the machine hem was completed, I then turned it under another 2” and completed the blind hem stitch by hand. If you are not familiar with the blind hem stitch, there are TONS of tutorials on YouTube.
Double hem: At this point, I tried the dress on my niece. In fact, the photo below is a picture of her in the dress before I did this last double hem. As you can see, the length looks nice, but I found that when she tried to crawl, her feet would get stuck in the long dress, so I decided to add a double hem. To do this, I turned the dress under ANOTHER 2” and completed a 2nd hem using the blind hem stitch again.
The great thing about a double hem is that as my niece grows, we can simply rip out this second hem and the dress will grow with her!
Finish
The last step to finish the dress is to attach the two buttons to the bodice. I did this by hand sewing in place using thread that matched the color of the bodice.

***You may make and sell products from my patterns but if you do I ask that you link back to my post. Please do not copy and post this pattern and claim it as your own, or attempt to sell this pattern. Please do not re-publish photos as your own.